 Save
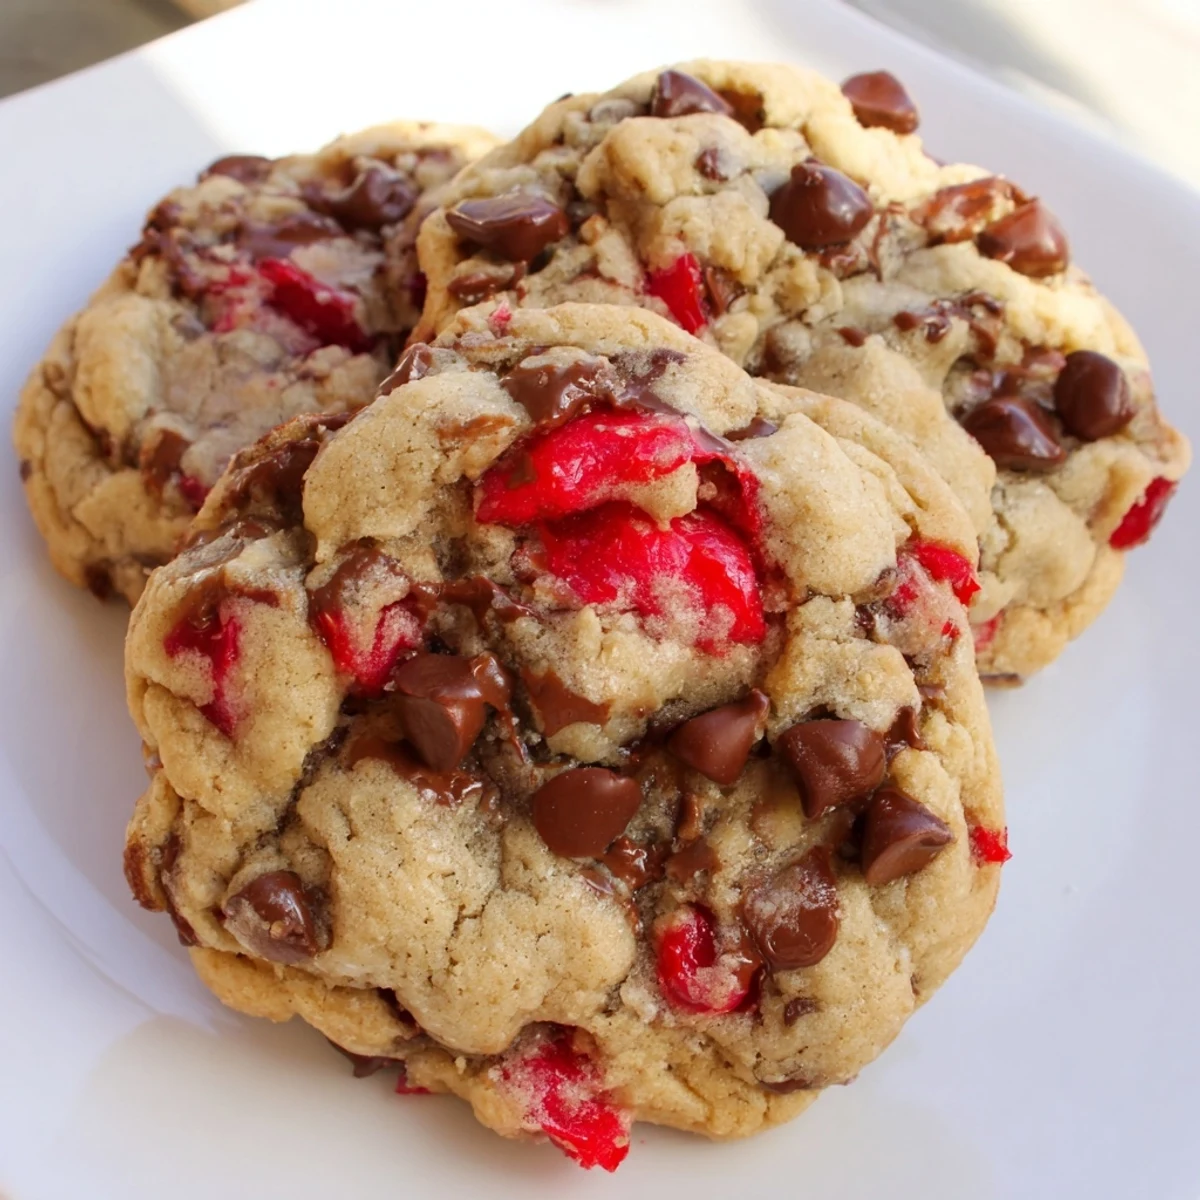
Save These soft, chewy treats combine the classic appeal of chocolate chip cookies with the vibrant sweetness of maraschino cherries. The dough comes together quickly with softened butter creamed with granulated and brown sugars, then enriched with eggs and vanilla. After combining the dry ingredients, folded-in chopped cherries and semi-sweet chips create pockets of fruity chocolate flavor throughout. Bake at 350°F for just 10-12 minutes until edges turn golden, then cool for perfectly tender centers. Each cookie delivers buttery richness balanced by bright cherry notes, making them ideal for sharing or enjoying with a cold glass of milk.
The first time my grandmother brought these cookies to a family picnic, I remember thinking they looked like little jewels. Those bright red cherries caught the sunlight on the picnic table, and I honestly could not stop staring at them. She laughed when I reached for one before anyone else had the chance, telling me these were always going to be my favorite.
Last summer my neighbor smelled these baking through our open kitchen window and actually knocked on the door to investigate. We ended up sitting on the back porch sharing warm cookies and trading cherry pitting stories until the sun went down.
Ingredients
- Unsalted butter: Softened to room temperature helps create those perfectly tender crumb edges we all love
- Granulated sugar: Creates the crisp exterior that gives way to that wonderful chewy center
- Light brown sugar: Packed tight brings moisture and that subtle caramel depth
- Large eggs: Room temperature eggs incorporate better for consistent texture
- Pure vanilla extract: Do not skimp here because real vanilla makes all the difference
- All-purpose flour: Provides the structure needed to hold all those gorgeous add-ins
- Baking soda: Gives the cookies their perfect rise and spread
- Salt: Balances the sweetness and lets the cherry flavor shine through
- Maraschino cherries: Pat them completely dry or they will create soggy spots in the dough
- Semi-sweet chocolate chips: The perfect partner to sweet cherries without overwhelming them
Instructions
- Get your oven ready:
- Preheat to 350°F and line those baking sheets with parchment paper so nothing sticks
- Cream the butter and sugars:
- Beat together until the mixture turns light and fluffy, which usually takes about 3 minutes of serious mixing
- Add the eggs and vanilla:
- Add eggs one at a time, really beating well after each one, then stir in that generous vanilla
- Whisk the dry ingredients:
- In a separate bowl combine flour, baking soda, and salt until everything is evenly distributed
- Combine everything:
- Gradually add those dry ingredients to the wet mixture, mixing only until you no longer see flour streaks
- Fold in the stars:
- Gently fold in those dried cherries and chocolate chips until they are evenly distributed throughout
- Scoop and space:
- Drop heaping tablespoons onto prepared sheets, leaving 2 inches between each because they will spread
- Bake to perfection:
- Bake for 10-12 minutes until edges are golden but centers still look slightly soft
- Cool completely:
- Let them rest on the baking sheet for 5 minutes before moving them to a wire rack
 Save
Save My daughter now requests these for every school bake sale, and I always get texts from other parents asking for the recipe. There is something about that combination of sweet cherries and chocolate that makes people remember exactly where they were when they first tried them.
Making Them Ahead
The dough freezes beautifully for up to 3 months, so I always double the batch and keep portioned balls in the freezer. Just bake them straight from frozen, adding 2 extra minutes to the baking time.
Cherry Preparation Secrets
I have learned that draining cherries on paper towels for at least 15 minutes makes all the difference. Sometimes I even give them a gentle squeeze to remove that last bit of excess liquid.
Perfect Cookie Every Time
Watch the edges like a hawk during that last minute of baking because they can go from golden to burnt quickly. I set my timer for 10 minutes and check every 60 seconds after that.
- Pull them from the oven when centers still look slightly underdone
- Let them cool completely before storing in an airtight container
- A slice of bread in the container keeps them soft for days
 Save
Save These cookies have become such a staple in our house that my husband can smell them baking from the driveway. Hope they bring just as much joy to your kitchen as they have to ours.
Recipe FAQs
- → Why should I pat the cherries dry before adding them?
-
Drying the chopped maraschino cherries prevents excess moisture from making the cookie dough soggy. Thoroughly patting them with paper towels ensures the cherries distribute evenly throughout the dough without affecting the texture or baking results.
- → Can I use fresh cherries instead of maraschino?
-
Fresh cherries can be used, though they'll provide a tartness rather than the sweet, candy-like flavor of maraschino cherries. If using fresh, pit and chop them, then toss in a tablespoon of sugar before adding to the dough to balance the acidity.
- → How do I store these cookies?
-
Store completely cooled cookies in an airtight container at room temperature for up to 5 days. Place parchment paper between layers to prevent sticking. For longer storage, freeze baked cookies in freezer bags for up to 3 months.
- → What's the purpose of almond extract in the notes?
-
Almond extract enhances the natural cherry flavor, creating a more pronounced fruitiness. The nutty, sweet notes of almond complement both the cherries and chocolate, adding depth to the overall flavor profile without overpowering the other ingredients.
- → Can I make the dough ahead of time?
-
Yes, the dough can be prepared and refrigerated for up to 48 hours before baking. Chilling the dough actually enhances flavor development and can result in thicker, chewier cookies. Let chilled dough sit at room temperature for 10 minutes before scooping and baking.
- → Why do I need to cool the cookies on the baking sheet first?
-
Cooling on the baking sheet for 5 minutes allows the cookies to set slightly, making them easier to transfer without breaking. During this time, residual heat continues cooking the centers, ensuring they're fully set while maintaining their soft, tender texture.