Save
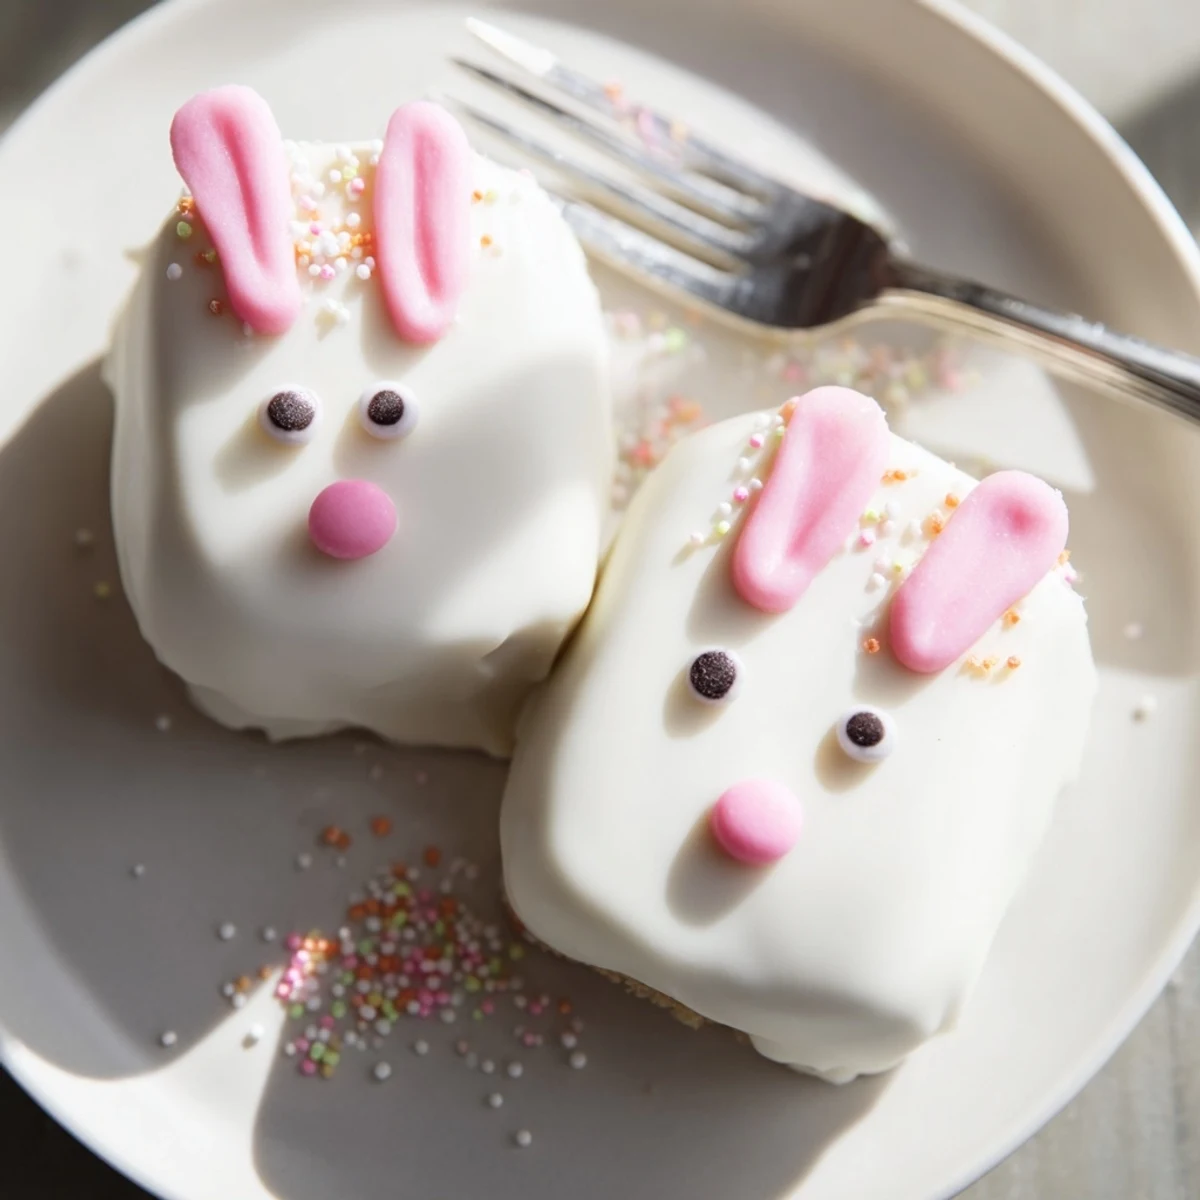
Save These delightful bunny-shaped treats combine moist vanilla cake crumbs with cream cheese and butter for a rich, doughy base. Each portion is shaped into an adorable bunny face, dipped in velvety white chocolate, and decorated with candy eyes, sprinkles, or fondant details. The result is a festive handheld dessert that's perfect for spring gatherings.
Preparation takes just 25 minutes with simple mixing and shaping. The white chocolate coating creates a smooth, sweet shell that complements the soft interior. Decorate with colorful details to bring each bunny to life—pink ears, cute noses, and playful eyes make these irresistible for both children and adults.
Store in the refrigerator for up to three days, making these ideal for preparing ahead of your celebration. The combination of creamy filling and crisp chocolate coating offers satisfying texture contrast in every bite.
Last Easter my kitchen became something of a disaster zone, and I mean that in the best possible way. My niece insisted we make something Instagram-worthy for the family gathering, and these bunny cakesicles were born from a three-hour sugar-fueled adventure involving way too many sprinkles and chocolate fingerprints everywhere. The adults kept stealing them from the kids' table, which I consider the ultimate dessert success.
I started making these after a failed attempt at fancy decorated cake pops left me with a bowl of rejected cake balls and a room full of disappointed kids. Now they request these by name every holiday, and I have learned to triple the recipe because somehow they vanish before dessert even officially starts.
Ingredients
- Vanilla cake crumbs: The foundation of everything. I have used everything from stale bakery cupcakes to homemade cake that did not quite rise properly, and they all work beautifully
- Cream cheese and butter: These create the creamy binding that holds the cake together without making it soggy
- Powdered sugar: Just enough sweetness to balance the tang from the cream cheese
- White chocolate: Use candy melts for easier dipping or good quality white chocolate for better flavor
- Cakesicle sticks: Essential for that carnival treat vibe, though lollipop sticks work in a pinch
Instructions
- Mix your cake base:
- Combine the cake crumbs, cream cheese, butter, powdered sugar, and vanilla until everything comes together like a soft dough. It should hold its shape when squeezed but not feel sticky.
- Shape the bunnies:
- Form the mixture into 8 flattened ovals, pressing gently to compact them. Think slightly pudgy bunny faces rather than perfect ovals.
- Insert the sticks:
- Push a stick about halfway into each shape, being careful not to push all the way through. Chill for at least 20 minutes so they firm up, otherwise they will slide right off the sticks during dipping.
- Melt the chocolate:
- Microwave the white chocolate in 30-second bursts, stirring between each, until completely smooth and fluid.
- Dip and decorate:
- Dip each cake pop into the chocolate, tap off the excess, and immediately add decorations while the coating is still wet. This is when the candy eyes and sprinkles actually stick.
 Save
Save My now teenage daughter still talks about the year we made 50 of these for her school spring festival and ended up with pink and yellow chocolate splattered across every surface of my kitchen. That was also the year I learned to line the counter with parchment paper before we start decorating.
Flavor Variations
While vanilla and white chocolate is classic, I have experimented with chocolate cake crumbs using dark chocolate coating, and lemon cake with a white chocolate shell. The best part about these is using whatever cake you have on hand, even the slightly dry pieces nobody wants to eat plain.
Decoration Ideas
Fondant bunny ears look professional but pretzel sticks dipped in pink chocolate work just as well and add a salty crunch that everyone loves. I keep candy eyes in my baking cabinet year-round now because they make everything infinitely cuter.
Storage and Make-Ahead Tips
These actually taste better after sitting overnight in the fridge, which means you can make them a day ahead and save yourself some Easter morning chaos. The coating sets firmer and the flavors meld together beautifully.
- Layer them between wax paper in an airtight container so they do not stick together
- Bring them to room temperature 15 minutes before serving for the best texture
- If the chocolate gets soft when serving, pop them back in the fridge for 10 minutes
 Save
Save There is something deeply satisfying about biting through crisp white chocolate into soft, creamy cake. These little bunnies have become the most requested treat at every spring gathering I host, and honestly, I am not mad about it.
Recipe FAQs
- → Can I make these ahead of time?
-
Yes, these store beautifully in an airtight container in the refrigerator for up to 3 days. Prepare them a day or two before your celebration for stress-free entertaining.
- → What other cake flavors work well?
-
Chocolate, lemon, red velvet, or funfetti cake crumbs all work wonderfully. Choose your favorite or match your celebration's color scheme with different cake bases.
- → Do I need a special mold?
-
A cakesicle mold helps create uniform shapes, but you can simply hand-form the mixture into flattened ovals and insert sticks. The mold is optional for success.
- → How do I prevent the coating from cracking?
-
Ensure the cake centers are thoroughly chilled before dipping. Work with room-temperature chocolate for smooth coating, and tap gently to remove excess for an even finish.
- → What decorations work best?
-
Candy eyes, sprinkles, fondant ears and noses, or even pretzel sticks for ears all create adorable bunny details. Edible food coloring pens let you add precise facial features.
- → Can I use colored coating?
-
Absolutely! Add gel food coloring to white chocolate melts for pastel bunnies, or swirl in color for a marbled effect. Avoid liquid coloring which can seize the chocolate.