 Save
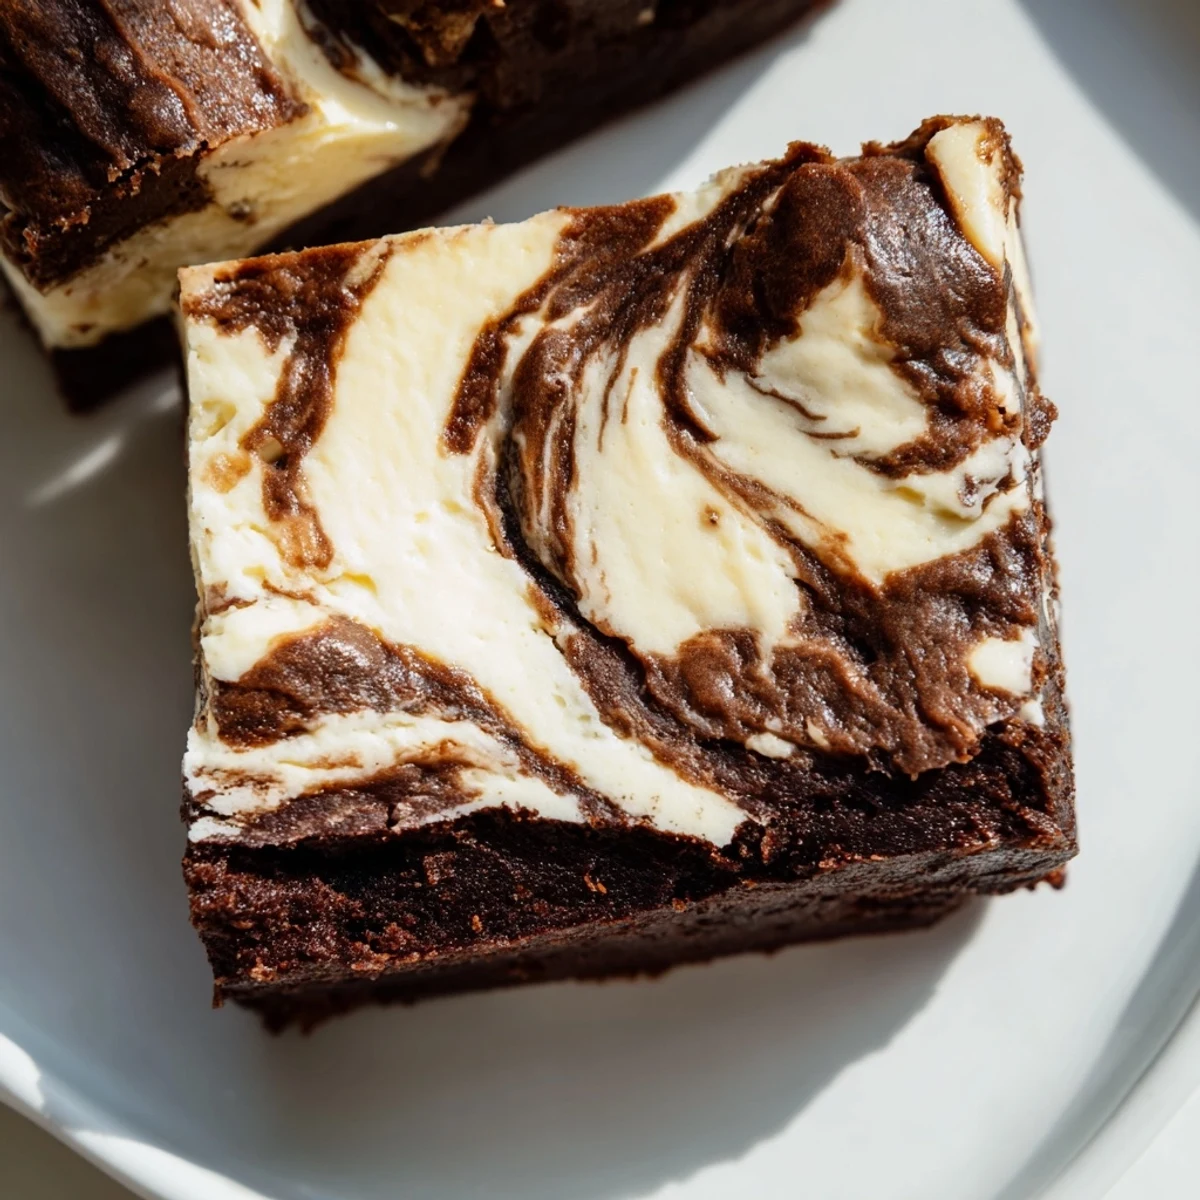
Save These indulgent bars combine the best of both worlds—fudgy sourdough brownies and tangy cheesecake in one irresistible dessert. The sourdough starter adds a subtle tang that balances the sweetness, while the marble swirl creates a stunning presentation.
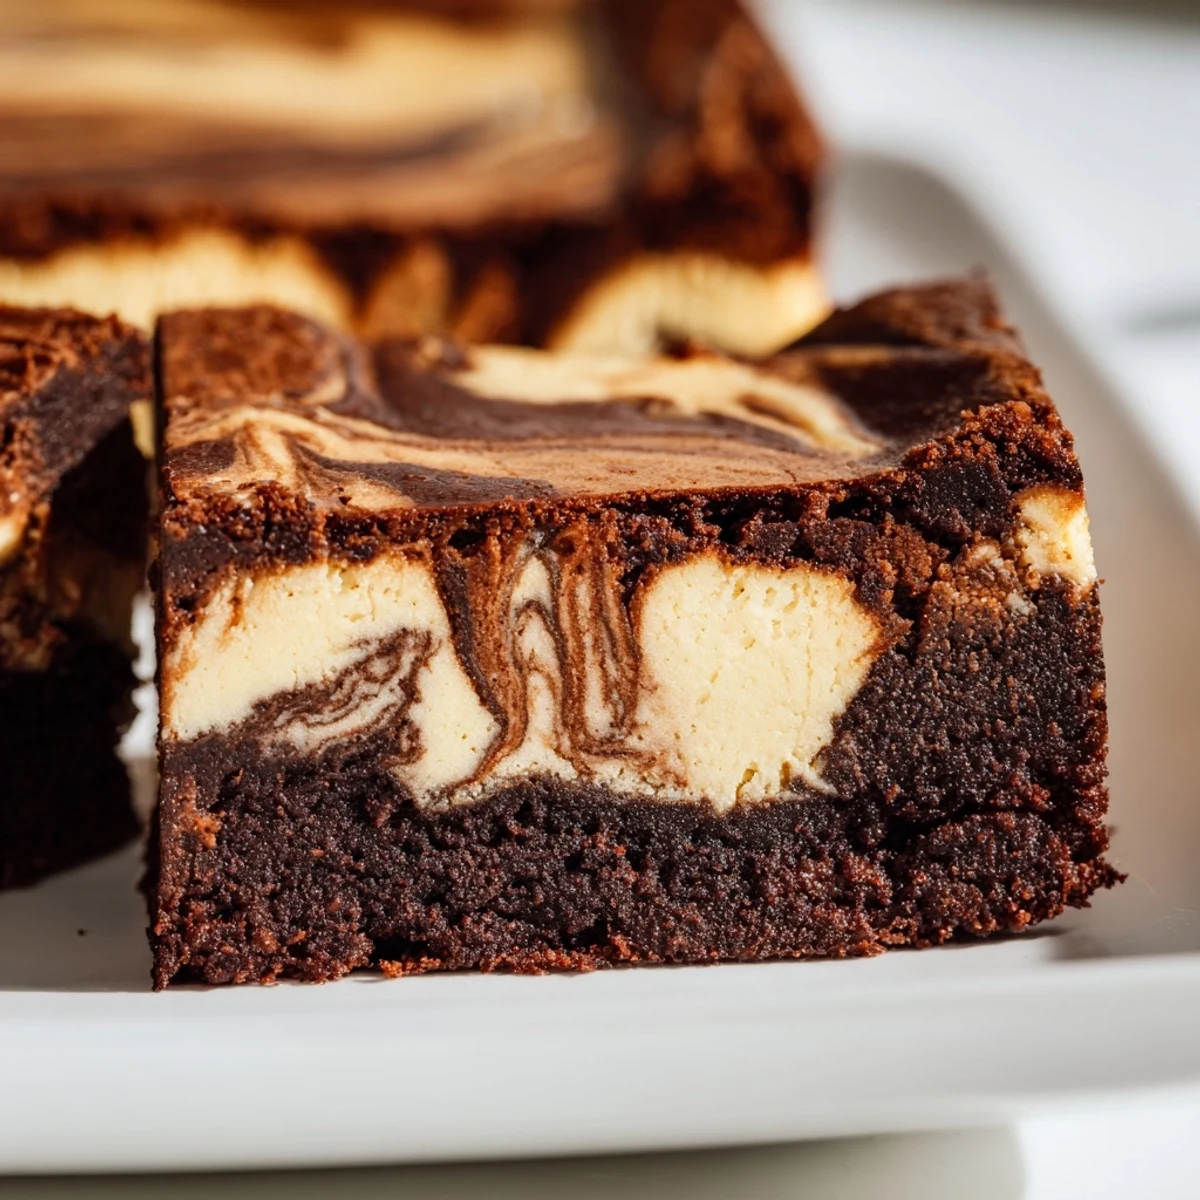
Perfect for using up sourdough discard or active starter, these bars come together in about an hour from start to finish. The brownie layer stays incredibly moist and dense, while the cheesecake topping adds a creamy contrast that melts in your mouth.
Chilling before slicing is essential for clean, neat bars. The result is a sophisticated treat that tastes like it came from a bakery, yet uses simple pantry staples and that beloved sourdough starter you've been nurturing.
The Tuesday my sourdough starter overflowed its jar at 5 a.m. was the day these bars were born, partly out of desperation and partly out of the kind of kitchen stubbornness that refuses to throw anything away. I had cream cheese sitting in the fridge and a half used bar of dark chocolate, and somewhere between the tang of discard and the richness of melted cocoa, a small miracle happened. These bars have been showing up at every potluck and birthday I attend ever since. They are messy, imperfect, and absolutely impossible to stop eating.
My neighbor Karen knocked on my door the afternoon I made my second batch, claiming she could smell chocolate through the shared wall. I handed her a bar still warm from the pan, and she stood in the hallway eating it in complete silence before looking up and saying absolutely nothing, just nodding with her eyes closed. That was all the review I needed.
Ingredients
- Unsalted butter (115 g): Use good quality butter here because it carries the entire brownie base and cheap butter will taste flat.
- Dark chocolate (120 g), chopped: The darker the better, aim for 70 percent, and chop it small so it melts evenly with the butter without seizing.
- Granulated sugar (150 g for brownies): This amount gives a crackly top and chewy center, do not reduce it or the texture collapses.
- Large eggs (3 total): Room temperature eggs blend smoother into both batters and prevent any weird streaks.
- Vanilla extract (2 tsp total): Split between the brownie and cheesecake layers, it rounds out the tang in both.
- Sourdough starter (90 g): Active, discard, or fed all work, and the tang is the whole point of this recipe so never skip it.
- All-purpose flour (65 g): Measured by weight if possible because even a little extra makes the brownies cakey instead of fudgy.
- Salt (1/4 tsp): Just enough to wake up the chocolate without making it taste salty.
- Cream cheese (225 g), softened: Leave it out for at least an hour because cold cream cheese will leave lumps no amount of beating can fix.
- Granulated sugar (50 g for cheesecake): A modest amount that sweetens without overpowering the tangy cream cheese flavor.
Instructions
- Preheat and prep the pan:
- Set your oven to 175 degrees Celsius (350 degrees Fahrenheit) and line a 20 by 20 cm pan with parchment, leaving overhang on two sides like handles so you can lift the whole thing out later without wrecking it.
- Melt chocolate and butter together:
- Use a saucepan over the lowest heat you can manage, stirring gently until the mixture is glossy and smooth, then pull it off the heat before it scorches even a little.
- Build the brownie batter:
- Let the chocolate cool for a minute so you do not scramble the eggs, then whisk them in one at a time followed by the vanilla and sourdough starter until everything is beautifully combined. Fold in the flour and salt with a spatula, stopping the moment you stop seeing dry streaks.
- Reserve and spread:
- Scoop out about a quarter cup of batter and set it aside, then spread the rest evenly across the bottom of your prepared pan using the back of a spoon or an offset spatula.
- Make the cheesecake layer:
- Beat the softened cream cheese and sugar together until completely smooth and lump free, then add the egg and vanilla and beat just until creamy, being careful not to overmix or it will puff up and crack in the oven.
- Layer and swirl:
- Spread the cheesecake mixture gently over the brownie base, then dollop the reserved brownie batter in spoonfuls across the top and drag a skewer or butter knife through both layers in figure eight motions to create those gorgeous swirls.
- Bake until just set:
- Slide the pan into the oven for 30 to 35 minutes, looking for a center that is just barely set with a toothpick that comes out with a few moist crumbs clinging to it, not wet batter.
- Cool and chill before slicing:
- Let the bars cool completely in the pan at room temperature, then refrigerate for at least one hour before cutting so you get clean, bakery worthy squares instead of a crumbly mess.
 Save
Save The real magic of these bars hit me during a rainy Sunday when I packed a few into my daughters lunchbox and she came home asking why I never made regular brownies anymore. Something about that sourdough tang had ruined her for ordinary desserts, and honestly it had ruined me too.
Getting That Swirl Right
The swirl is half the beauty of these bars, and it took me about four attempts to stop overthinking it. Use a light hand with the skewer and resist the urge to go back and forth too many times, because the swirls turn muddy and indistinct if you work the batter to death. Less is genuinely more here.
Storing and Serving
These bars keep beautifully in an airtight container in the refrigerator for up to five days, and the texture actually improves after the first day as the flavors meld and the fudgy layer firms up. I like to let them sit at room temperature for about fifteen minutes before serving so the cream cheese layer softens just enough to feel luxurious rather than stiff.
Variations Worth Trying
Once you have the base recipe down, there is a lot of room to play around with flavors and add ins depending on what you have on hand. The brownie batter is forgiving enough to handle a few extras without breaking.
- Espresso powder, just half a teaspoon, amplifies the chocolate in a way that makes people close their eyes when they take a bite.
- Chopped walnuts or pecans folded into the brownie batter add a welcome crunch against all that creamy richness.
- A handful of mini chocolate chips scattered over the top before baking creates little pockets of melted chocolate in every single square.
 Save
Save Every time I pull a pan of these from the oven, I think about that chaotic Tuesday morning when my starter decided to misbehave and ended up giving me the best accident of my baking life. Some recipes you plan for, and some just find you when you need them.
Recipe FAQs
- → Can I use unfed sourdough starter?
-
Yes, you can use either active fed starter or unfed sourdough discard in this recipe. Both work well and provide that characteristic tangy flavor that complements the rich chocolate.
- → Why add sourdough to brownies?
-
Sourdough starter adds a subtle tang that balances the sweetness of chocolate and sugar. It also contributes to the fudgy texture and helps keep the brownies moist for days.
- → How do I know when they're done baking?
-
The bars are done when the center is just set and a toothpick inserted comes out with a few moist crumbs. Avoid overbaking—some wobble in the center is normal as they'll continue cooking while cooling.
- → Can I add mix-ins to the batter?
-
Absolutely! Chocolate chips, chopped nuts, or even espresso powder work wonderfully in the brownie layer. Just fold them in with the flour to avoid overmixing.
- → How should I store these bars?
-
Store in an airtight container in the refrigerator for up to 5 days. The chilled texture is even better—cool and creamy. They can also be frozen for up to 3 months if well-wrapped.
- → Why must I chill before slicing?
-
Chilling allows the cheesecake layer to fully set and the flavors to meld. This step ensures clean, neat slices without the layers smearing together. At least 1 hour in the refrigerator is recommended.