 Save
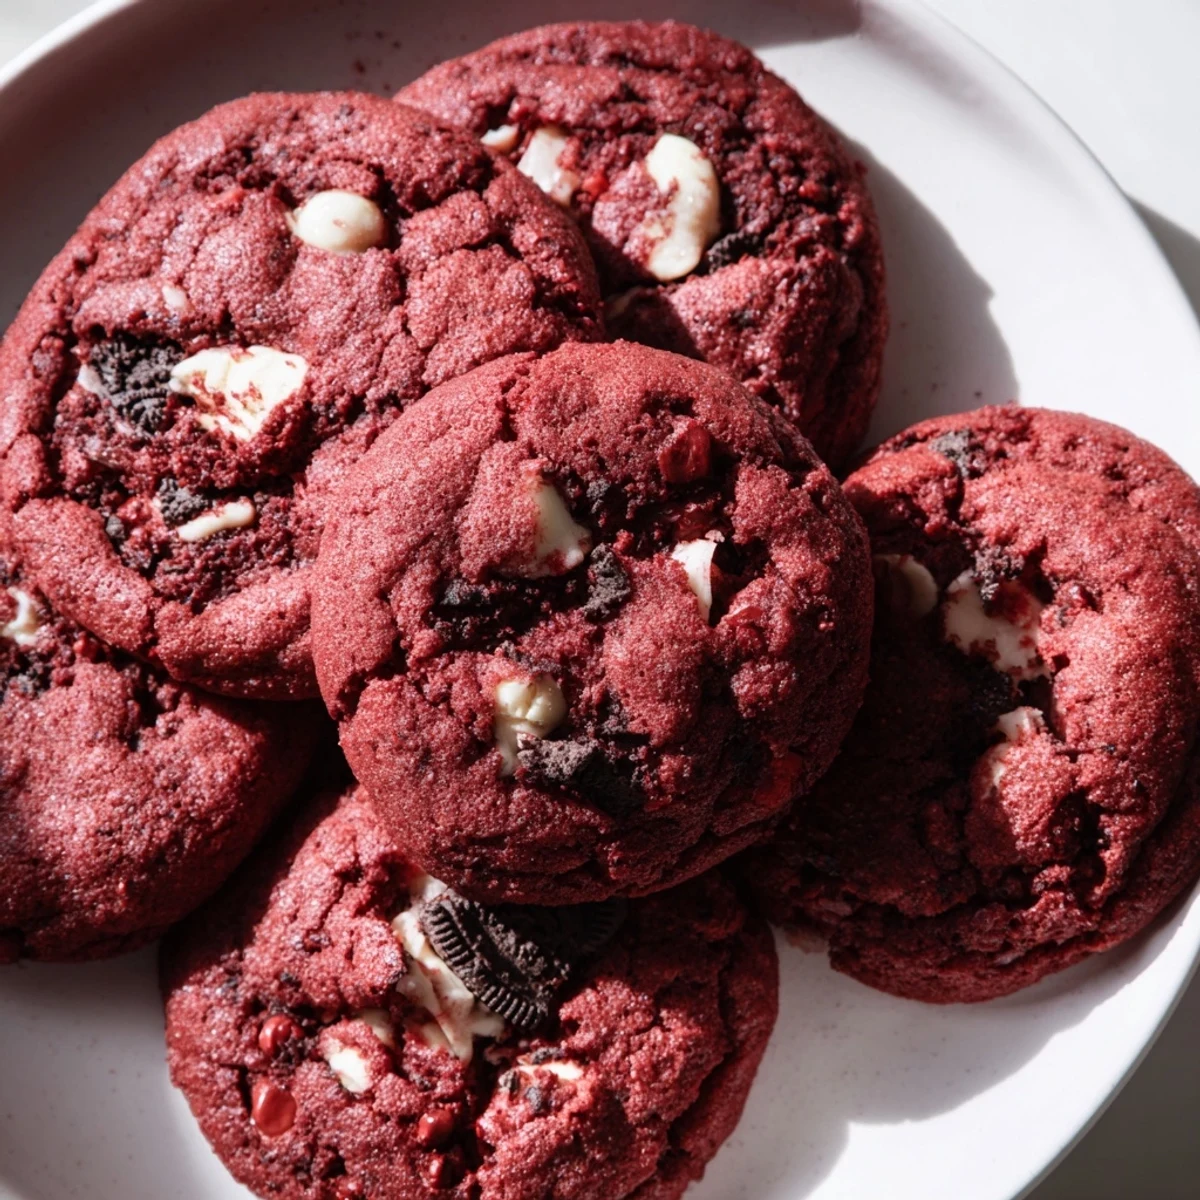
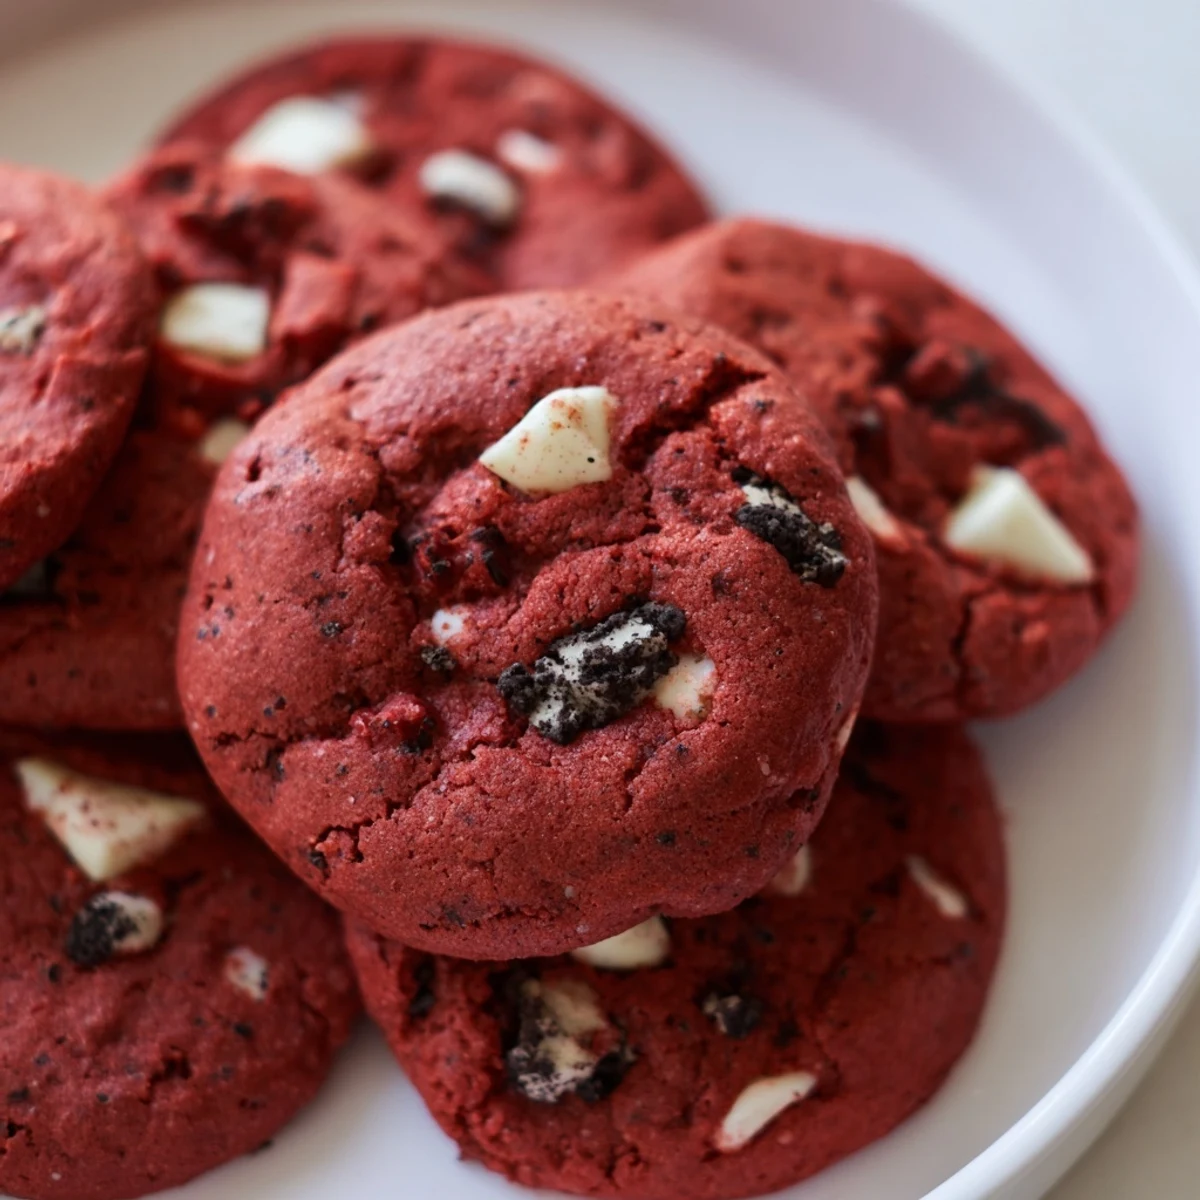
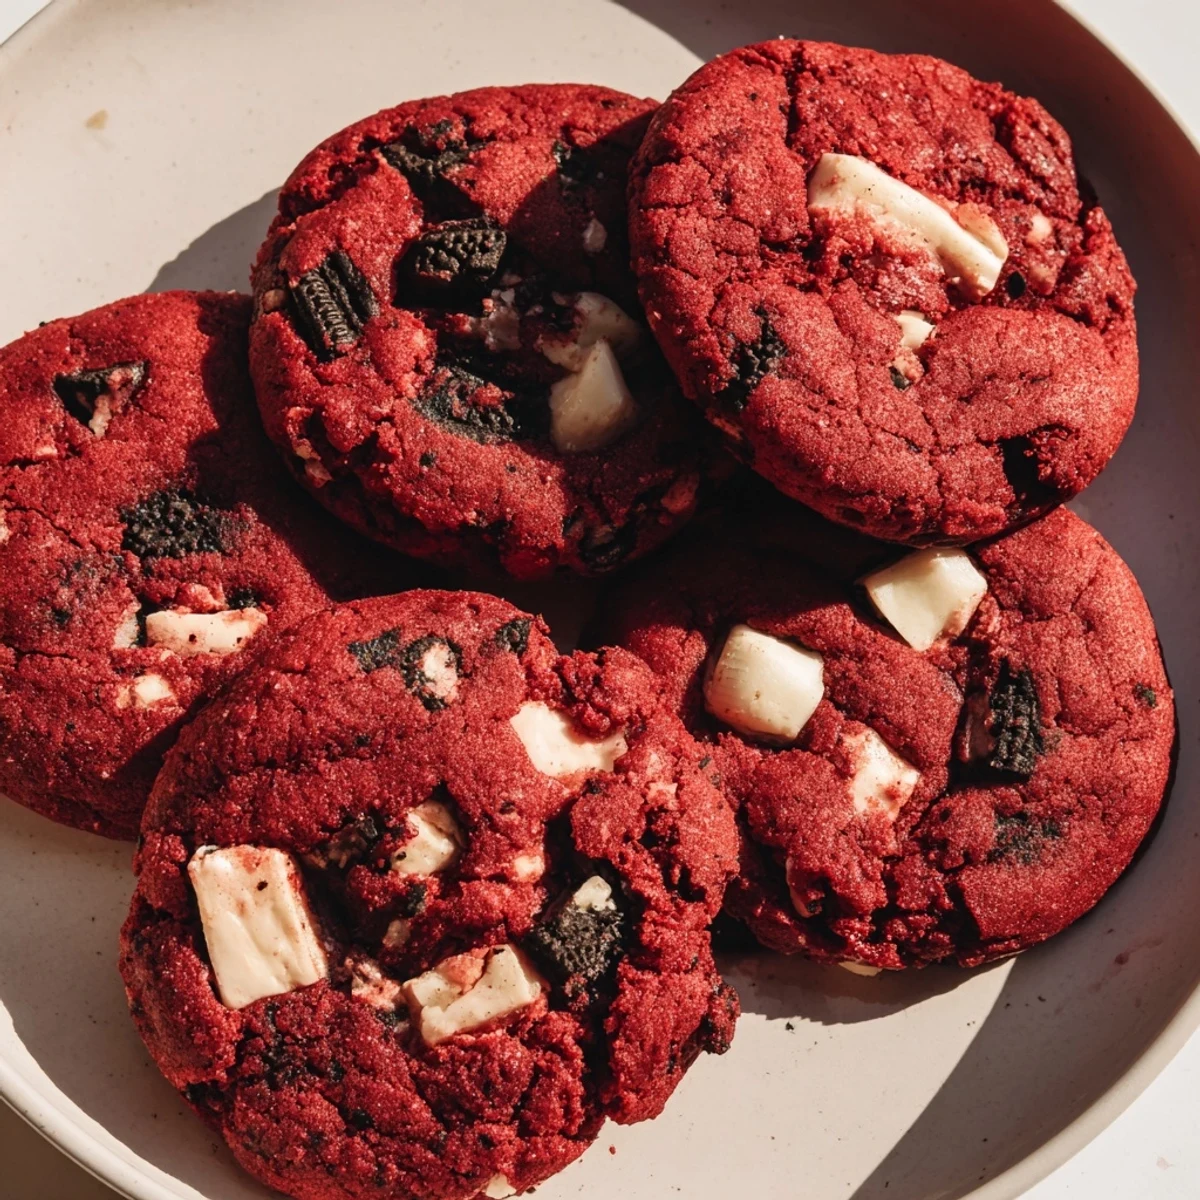
Save These soft red velvet cookies combine the classic cocoa flavor and vibrant color of red velvet with the irresistible crunch of chopped Oreos and creamy white chocolate chips. The dough comes together quickly with simple pantry staples, delivering a perfectly chewy texture with crisp edges.
Baked until just set with slightly underbaked centers, these treats offer the ideal balance of tender crumb and satisfying crunch from the Oreo pieces throughout. The natural cocoa provides deep chocolate notes while white chocolate adds creamy sweetness in every bite.
I made these on a rainy Tuesday when my apartment felt too quiet and I needed something ridiculous to chase away the gray. The red batter looked like something out of a cartoon, and I may have gotten more on my nose than in the bowl. My roommate walked in, took one look at the pink-streaked counter, and asked if I was starting a bakery or having a meltdown.
Brought a batch to my sisters house warming, and her husband ate four before anyone else even arrived. He kept pretending he was just quality control testing, but I saw him sneak another when he thought no one was watching. Now they request them for every gathering, which is the best kind of problem to have.
Ingredients
- 2 1/4 cups all-purpose flour: This creates the structure, but dont overmeasure or your cookies will turn into hockey pucks
- 2 tbsp unsweetened cocoa powder: Red velvet needs that subtle chocolate background or its just red cake
- 1 tsp baking soda: Gives them that perfect lift and chewy center we all want
- 1/2 tsp salt: Balances the sugar and makes the chocolate flavor pop
- 1 cup unsalted butter, softened: Room temperature is nonnegotiable here cold butter creates sad, flat cookies
- 3/4 cup light brown sugar and 1/2 cup granulated sugar: The combination creates crisp edges and fudgy middles
- 1 large egg plus 1 egg yolk: That extra yolk is the secret to ultra chewy texture
- 2 tsp vanilla extract: Dont be shy with vanilla, it carries the whole flavor profile
- 2 tbsp milk: Just enough moisture to bring everything together without making the dough sticky
- 1 tbsp red food coloring: Gel coloring gives you that vibrant red without adding extra liquid
- 1 cup white chocolate chips: The creamy sweetness that makes these completely addictive
- 12 Oreo cookies, roughly chopped: Leave some chunks big for that cookies and cream surprise in every bite
Instructions
- Get your oven ready:
- Preheat to 350°F and line your baking sheets with parchment paper because no one enjoys scrubbing baked-on sugar
- Whisk the dry team:
- Combine flour, cocoa powder, baking soda, and salt in a medium bowl and set it aside
- Cream the butter and sugars:
- Beat them together for about 2 to 3 minutes until they look pale and fluffy, this step is worth every second
- Add the wet ingredients:
- Mix in the egg, egg yolk, vanilla, milk, and red food coloring until everything is beautifully uniform
- Combine everything:
- Gradually fold in your dry ingredients, mixing just until you dont see flour anymore
- Fold in the good stuff:
- Gently incorporate those white chocolate chips and chopped Oreos, being careful not to overmix
- Scoop and space:
- Drop rounded balls onto your prepared sheets, leaving about 2 inches between them for spreading
- Bake to perfection:
- Bake for 10 to 12 minutes until the edges look set but the centers still seem slightly underdone
- The waiting game:
- Let them cool on the baking sheet for 5 minutes because they finish cooking there and need time to set
 Save
Save My niece asked if I could make them with blue food coloring for her birthday and now its a thing we do. Every year she picks a color, and we make these ridiculous rainbow cookies that taste just as good as they look.
Getting That Perfect Red
Gel food coloring is absolutely worth the special trip to the baking aisle. Liquid coloring works, but it throws off your dough consistency and youll end up adding more flour to compensate. I learned this the messy way, with pink-streaked everything and slightly dry cookies.
Cookie Science
That extra egg yolk isnt a typo. The additional fat creates a fudgier, chewier texture that keeps these soft for days. I tested this recipe without it once and they were still good, but missing that irresistible quality that makes people reach for seconds.
Storage and Sharing
These actually improve overnight as the flavors meld together. I've started making them the day before I need them, which requires serious self-control not to eat them all first. Store them in an airtight container at room temperature and they'll stay perfectly soft for up to five days, though they've never lasted that long in my house.
- Freeze the baked cookies for up to three months if you somehow have extras
- The dough balls freeze beautifully and can go straight from freezer to oven, just add two minutes to baking time
- Warm a leftover cookie for ten seconds in the microwave and thank me later
 Save
Save Theres something about a red velvet cookie that feels like a celebration, even on a random Tuesday. Make them for someone you love, or just for yourself because you absolutely deserve it.
Recipe FAQs
- → Can I use natural cocoa powder instead of Dutch-processed?
-
Yes, natural cocoa powder works well in these cookies. Dutch-processed cocoa provides a deeper, smoother chocolate flavor, but natural cocoa will give you a more intense chocolate taste with a slightly lighter crumb color. The red food coloring will still provide the signature hue regardless of cocoa type.
- → How do I prevent the cookies from spreading too much?
-
Chill the dough for 30 minutes before baking if your kitchen is warm. Using room-temperature butter (not melted) and measuring flour accurately by weight helps maintain proper structure. The right ratio of dry ingredients including the correct amount of baking soda also helps cookies hold their shape.
- → Can I freeze the dough or baked cookies?
-
Both freeze beautifully. Scoop dough balls onto a baking sheet, freeze until solid, then transfer to an airtight container for up to 3 months. Bake from frozen, adding 1-2 minutes to the time. Baked cookies freeze well for up to 2 months—thaw at room temperature for best texture.
- → What's the best way to chop Oreos for even distribution?
-
Place whole Oreos in a sealed plastic bag and crush with a rolling pin or meat mallet for varied chunk sizes, or pulse briefly in a food processor for uniform pieces. Aim for pieces between pea and marble-sized to ensure good distribution throughout the dough while maintaining visible chunks.
- → Why use both egg and egg yolk?
-
The extra yolk adds richness and creates a more tender, chewy texture while helping bind the dough. The additional fat from the yolk contributes to the soft center and prevents cookies from becoming too crisp, while the whole egg provides structure for proper rise during baking.
- → Can I reduce the amount of food coloring?
-
Absolutely. Start with 1 teaspoon and add more gradually until you reach your desired shade. Gel coloring is more concentrated than liquid, so you'll need less. The cookies will taste delicious regardless of color intensity—the red is purely visual and doesn't affect flavor.