 Save
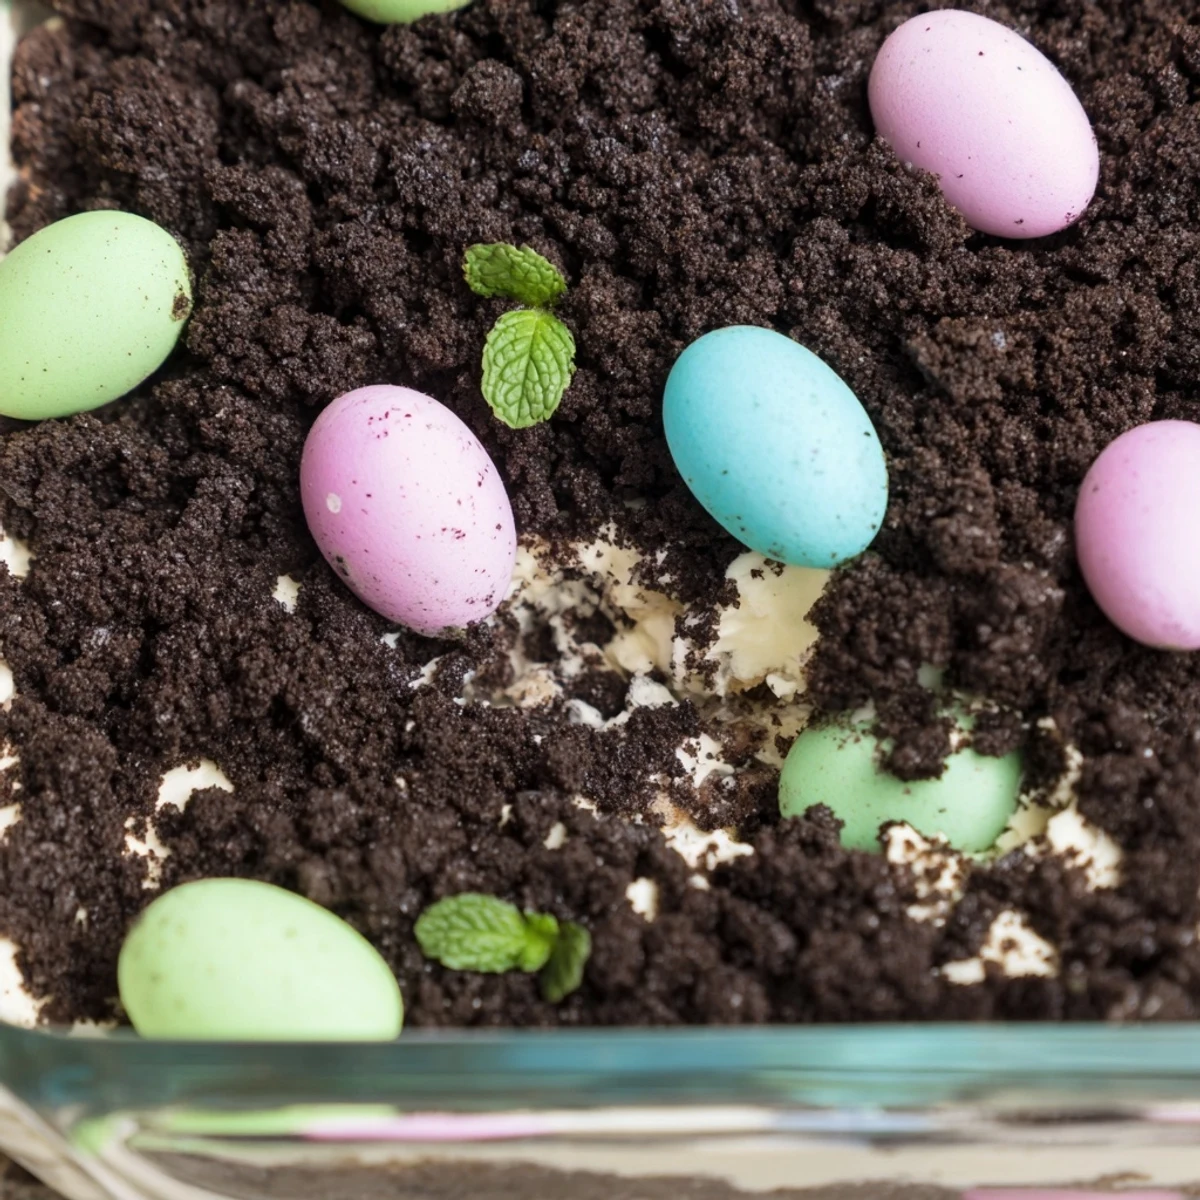
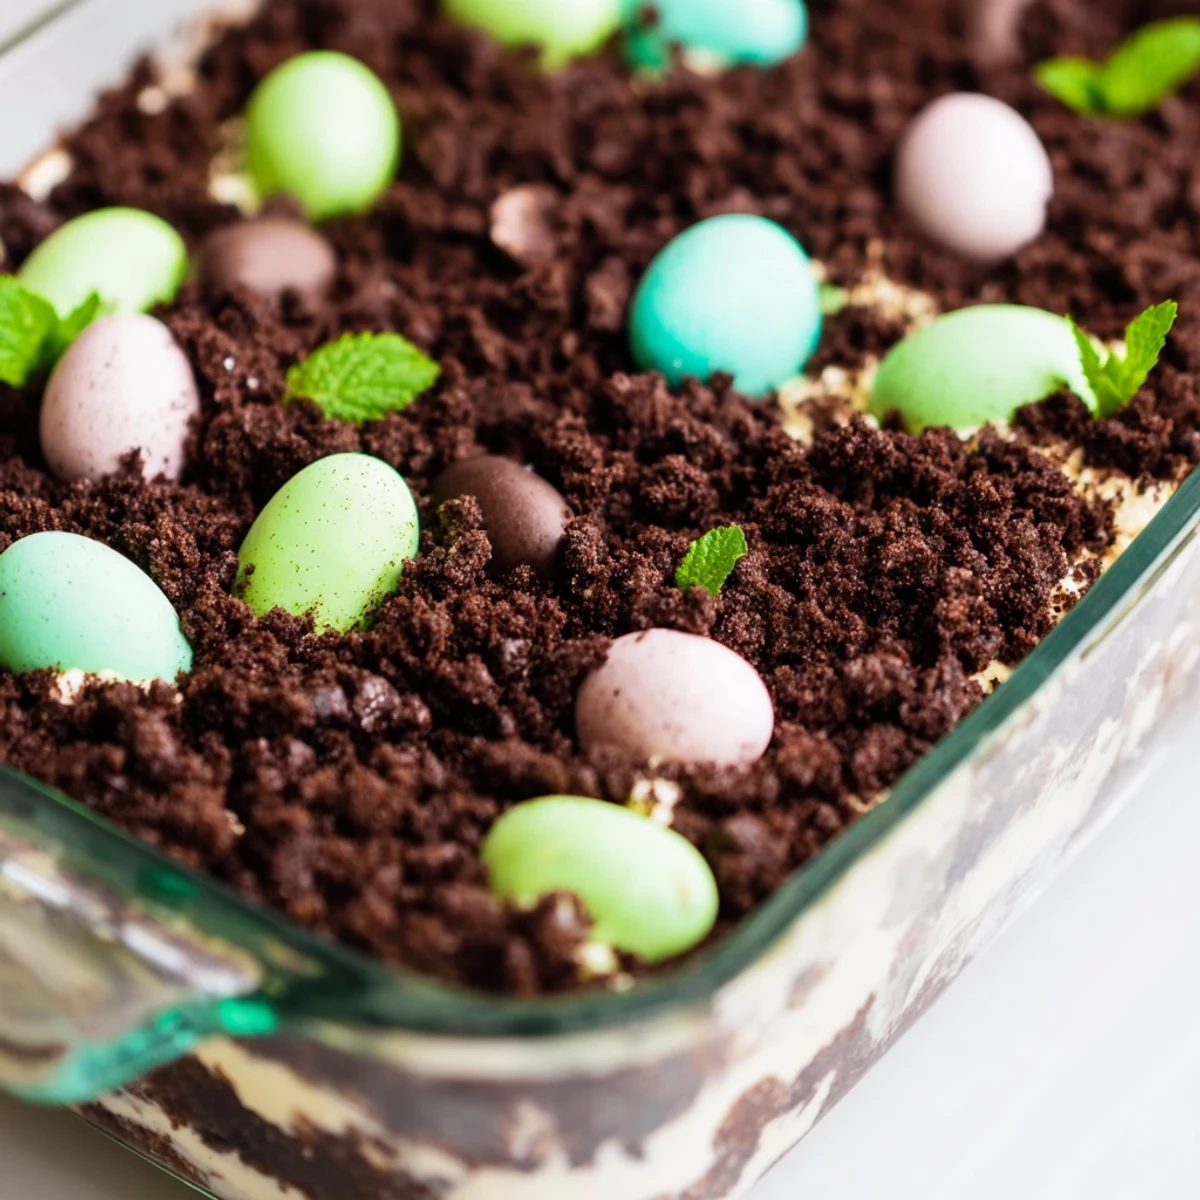
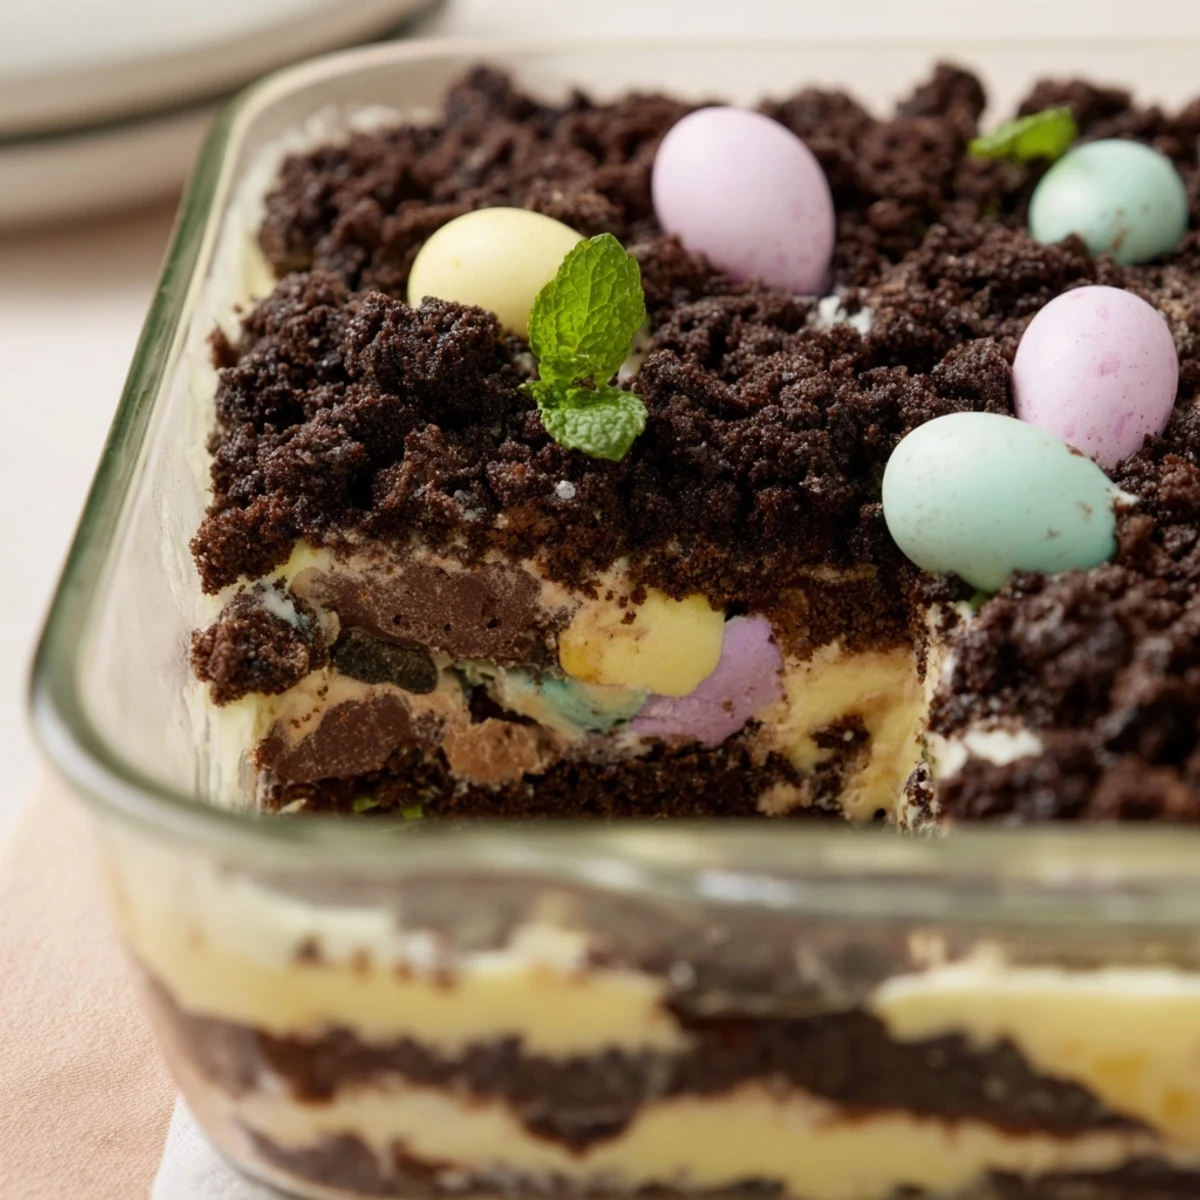
Save This playful spring dessert layers creamy vanilla pudding, smooth cream cheese filling, and chocolate cookie crumbs to create an irresistible treat that looks like a garden bed. Pastel chocolate eggs and candy-coated chocolates peek through the chocolate "dirt" while optional mint leaves add fresh greenery. The no-bake assembly comes together in just 25 minutes, making it ideal for busy holiday prep. Chill for two hours to let the layers set, then serve cold at your Easter celebration. The combination of textures—crunchy cookies, silky pudding, and smooth cream cheese—creates a delightful experience that both kids and adults will love reaching for during spring festivities.
Last Easter, my sister suggested we make something ridiculous together and ended up ordering six bags of Oreos like we were prepping for a dessert emergency. We crushed cookies while watching bad movies and accidentally created this masterpiece that disappeared in ten minutes flat.
My niece took one bite and declared it better than her actual Easter basket, which honestly says everything. Watching guests discover the candy eggs buried in the chocolate dirt became the highlight of our afternoon.
Ingredients
- Chocolate sandwich cookies: The foundation that creates authentic dirt texture, so crush them thoroughly for the best effect
- Cream cheese and butter: Room temperature ingredients blend into silkiness without any lumps ruining your creamy layer
- Powdered sugar: Sweetens and stabilizes the cream cheese mixture without adding graininess
- Instant vanilla pudding mix: Sets up quickly and provides the perfect lightweight texture between richer layers
- Cold milk: Essential for proper pudding development, so resist the temptation to use warm milk
- Pure vanilla extract: Deepens the vanilla flavor throughout the pudding layer
- Whipped topping: Lightens the pudding into clouds rather than dense custard, making each bite airy
- Pastel chocolate eggs: Nestle these into the top layer for hidden treasures that guests discover while eating
- Easter gummy candies: Optional but adds playful pops of color and chewy texture contrast
- Fresh mint leaves: Tucks around eggs to simulate fresh grass growing in your edible garden
Instructions
- Crush the cookies:
- Pulse chocolate sandwich cookies in a food processor or smash them in a sealed bag until they become fine dirt-like crumbs
- Blend the creamy base:
- Beat softened cream cheese and butter together until completely smooth, then incorporate powdered sugar until no streaks remain
- Whisk the pudding:
- Combine instant vanilla pudding mix with cold milk and vanilla extract, whisking for about two minutes until slightly thickened
- Lighten the pudding:
- Gently fold whipped topping into the pudding until the mixture is uniform and fluffy, being careful not to deflate it
- Build the first layer:
- Sprinkle half your cookie crumbs evenly across the bottom of a 9x13-inch casserole dish and press lightly
- Spread the cream cheese:
- Dollop the cream cheese mixture over the cookie layer, then spread gently to the edges
- Add the pudding layer:
- Carefully pour and spread the pudding mixture over the cream cheese layer, working slowly to prevent the layers from mixing
- Top with dirt:
- Sprinkle remaining cookie crumbs over the entire surface to completely cover the pudding layer
- Decorate your garden:
- Arrange pastel chocolate eggs, candy-coated chocolates, and gummy candies in clusters, tucking them partially into the dirt and adding mint leaves around them
- Chill before serving:
- Refrigerate for at least two hours to allow the layers to set and flavors to meld together
 Save
Save What started as a silly experiment became the dessert everyone talked about for weeks, proving that sometimes the most childish ideas are the ones that bring the most joy to a gathering.
Make It Your Own Garden
Swapping chocolate pudding for vanilla creates a mud pie variation that tastes even more decadent. Sometimes I layer both puddings for a striped effect that looks gorgeous when sliced.
Grass That Grows
Dying shredded coconut with green food coloring creates fluffy grass that holds up better than fresh mint and adds tropical flavor to the mix.
Serving Strategy
This dessert needs to stay cold until serving, so plan accordingly for outdoor events. I keep it in the cooler until the last possible moment.
- Use a clear dish so guests can see the beautiful layers from the outside
- Cut squares with a sharp knife wiped clean between slices for neat edges
- Extra crushed cookies on the side let guests add more dirt if they love the texture
 Save
Save Watch how quickly adults revert to childhood excitement when they dig for hidden chocolate eggs in their own serving.
Recipe FAQs
- → Can I make this Easter dirt cake ahead of time?
-
Yes, this dessert actually improves when made ahead. The layers need at least 2 hours to set properly, but you can prepare it up to 24 hours in advance. Cover tightly with plastic wrap and refrigerate until ready to serve. Add fresh mint leaves just before serving for the best appearance.
- → What type of cookies work best for the dirt effect?
-
Chocolate sandwich cookies like Oreos create the most authentic soil-like appearance. Their dark color and sweet flavor complement the creamy layers perfectly. You can also use chocolate graham crackers or vanilla wafers mixed with cocoa powder for different variations.
- → Can I substitute the whipped topping with homemade whipped cream?
-
Absolutely. Whip 2 cups of heavy cream until stiff peaks form, then gently fold it into the pudding mixture. Homemade whipped cream adds a fresher taste and lighter texture, though the dessert may be slightly less stable if sitting out for extended periods.
- → How do I make this dessert gluten-free?
-
Use gluten-free chocolate sandwich cookies for both layers. Many brands offer certified GF options. Also verify that your instant pudding mix and candies are certified gluten-free, as some contain hidden wheat-based ingredients or cross-contamination.
- → Can I customize the candy toppings for different occasions?
-
Certainly. Swap pastel Easter eggs for red strawberries for summer, candy corn for autumn, or peppermint pieces for winter. The layered base works beautifully with any seasonal theme, making it a versatile dessert year-round.
- → What size pan works best for this dessert?
-
A standard 9x13-inch casserole dish provides ideal proportions for the layers. This size allows enough room for distinct layers without making them too thin. A deep dish pan works especially well to prevent overflow when adding all the toppings.